Student Portfolio
Create and manage your project portfolio to showcase your best work and achievements.
The Student Portfolio is your personal showcase where you can create, manage, and display your coding projects, assignments, and achievements. This feature is currently available for IT Bootcamp students and serves as your professional portfolio for job applications, interviews, and career opportunities.
IT Bootcamp Feature
The portfolio feature is currently available only for IT Bootcamp students. It helps showcase your coding projects, technical skills, and professional development to potential employers and collaborators.
- Why this matters: A portfolio showcases your coding skills and projects to potential employers, helps track your development progress, and provides a professional representation of your work for job applications and interviews.
- Who uses it: IT Bootcamp students who want to build and showcase their project portfolio to demonstrate their technical abilities.
- When to use it: Throughout your bootcamp journey to document projects, track progress, and prepare for job applications and career opportunities.
How to Use
Accessing Your Portfolio
- Navigate to Portfolio: Log in to your student account and click Briefcase icon (💼) in the top right navbar.
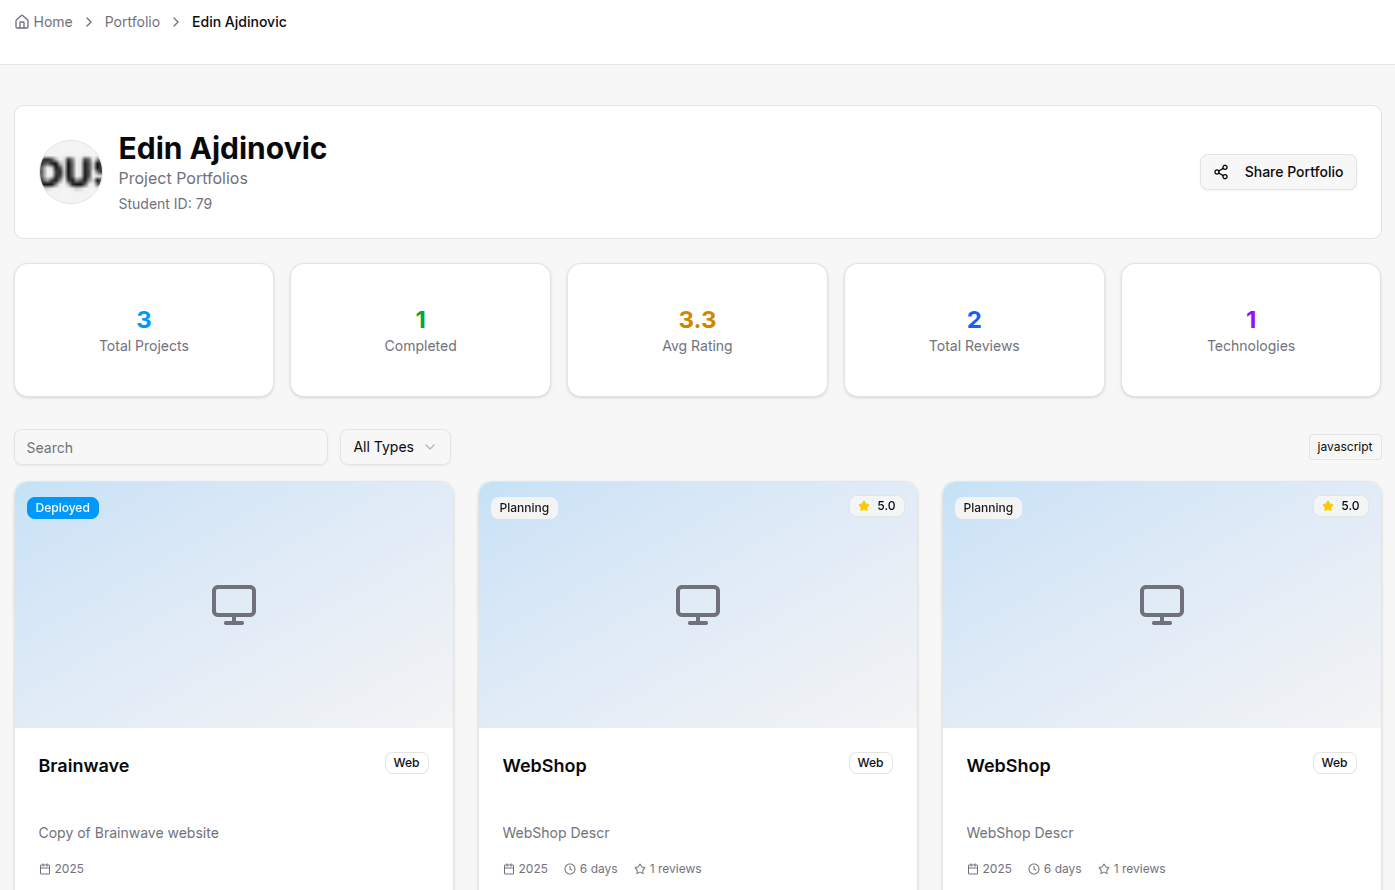
- Existing Projects: If you have projects, you'll see a grid view of all your projects with thumbnails and status badges.
Creating Your First Project
To create your first portfolio project, navigate to the Project Portfolio link in the sidebar. Before you start, make sure you have:
- GitHub repository link for your project
- Live demo URL (deployed application link)
- Video demo URL displaying application workflow
- Project images ready to upload
NOTE: All are optional, and you can create projects without them, but it is highly recommended that you have them.
The project creation process has four steps:
Step 1: Basic Details
- Project Title: Enter a descriptive name for your project.
- Project Type: Select the category (e.g., Web App, Mobile App, API, etc.).
- Description: Write a brief overview of your project and what it does.
- Technologies: Add technologies used in your project:
- Start typing to see autocomplete suggestions
- Add multiple technologies
- You can remove or add more later
- Status: Start with "Planning" - you can update this as you progress through development.
Step 2: Project Links
- GitHub URL: Add your project's GitHub repository link (validated automatically).
- Live Demo URL: Add a link to your deployed application (if applicable).
- Video Demo URL: Add a link to a demo video showcasing your project.
Step 3: Add Images
- Upload Images: Drag and drop files or click "Choose File" to select images.
- Image Preview: See thumbnail previews of uploaded images.
- Image Management: Remove unwanted images before proceeding.
- Automatic Compression: Images are automatically compressed (e.g., 1400px max width).
Step 4: Timeline & Visibility
- Start Date: Set when you started the project (required).
- End Date: Set when you completed the project (optional).
- Public: Toggle to make your project visible to instructors and potential employers.
- Featured: Toggle to highlight this project in your portfolio.
- Create Project: Click to create your project and redirect to the edit page.
Managing Project Images
After creating your project, you can manage images:
- Upload New Images: Use the file input to add more images to your project.
- Set Primary Image: Click "Set as Primary" on any image to use it as the portfolio thumbnail.
- Edit Captions: Type captions for your images and save by clicking outside the field.
- Delete Images: Click "Delete" to remove unwanted images.
Managing Your Projects
Updating Project Details
- Open Edit: Click "Edit" on any project card.
- Modify Information: Change title, status, dates, tech stack, or descriptions.
- Toggle Settings: Update Public/Featured status as needed.
- Save Changes: Click "Update" to save your changes.
Project Status Updates
Update your project status as you progress:
- Planning: Initial project planning phase
- Development: Actively coding and building
- Testing: Testing and debugging
- Completed: Project is finished and ready for showcase
Viewing Project Details
- Open Project: Click "View" on any project card to see detailed information.
- Project Header: See title, status badges, and edit button.
- Description: View your project description and details.
- Technologies: See all technologies used with tooltips.
- Links: Access GitHub, Live Demo, and Video Demo links.
- Timeline: View start and end dates.
- Sidebar Information: See average rating, reviews, image count, GitHub stats, and recent reviews.
- Image Gallery: View all project images with lightbox navigation.
For Organization Types
- Coding Projects: Showcase web applications, mobile apps, APIs, and coding challenges
- GitHub Integration: Link your GitHub repositories and showcase your coding activity
- Technical Skills: Display programming languages, frameworks, and tools you've mastered
- Project Timeline: Track your development journey from planning to completion
- Professional Portfolio: Build a portfolio for job applications and career opportunities
- Portfolio feature is not available for Sports Academy students
- Use alternative methods to track athletic achievements and progress
- Portfolio feature is not available for Madrasa students
- Use alternative methods to track academic and religious education progress
Tips
- Start Early: Begin documenting your projects from the planning phase
- Update Regularly: Keep your project status and information current
- Use Clear Images: Upload high-quality screenshots and demos
- Set Primary Images: Choose the best image to represent each project
- Make Completed Projects Public: Share your finished work with potential employers
- Keep Descriptions Clear: Write concise, professional descriptions
- Valid GitHub Links: Ensure your GitHub URLs are correct and accessible
- Manage Technology Tags: Keep your tech stack organized and relevant
- Regular Reviews: Check your portfolio regularly for accuracy and completeness
- Professional Presentation: Maintain a professional appearance for job applications